Removing background from image with imagemagick - revisited
08 Apr 2013


A long time ago I wrote a post about how to remove background from images using 2 simple commands with imagemagick.
Recently, I acquired a new computer, and I had to download imagemagick again.
Obviously, I went to my blog to remember the commands I used, and I copy-pasted them, only to discover they do not work!
I had no doubt they did work once, since I used them for a couple of years with great success.
But all of a sudden, instead of giving me a transparent image, it gave me a gray scale image.
I tried to download older versions of imagemagick, and to contact the team, but to no avail.
I noticed that the documentation was a lot more extensive today than it used to be,
so I decided to reconstruct the commands I needed once more.
When do I use imagemagick?
As a web developer who is responsible for writing HTML pages
I often get an image generated by a designer of how the web page should look like.
A lot of designers use photoshop - which is unavailable to me - and either give me a PSD, or a PNG.
I try to open the PSD with GIMP, or Paint.NET (yes - they have a plugin for this) - but it never produces
the outcome I want as it usually modifies the colors or fonts are all messy.
I learned, a long time ago, that the fastest way to slice HTML, is by cutting the PNG to pieces, and make
each piece transparent.
Sounds cumbersome, but it really is not.
To begin with, CSS3 really helps as you get a lot of things done without any images and with maximum quality.
By the time you get to the images, there usually not a lot of work left.
Finally, working with imagemagick allows me to purchase images online and modify them as I see fit.
Removing Background
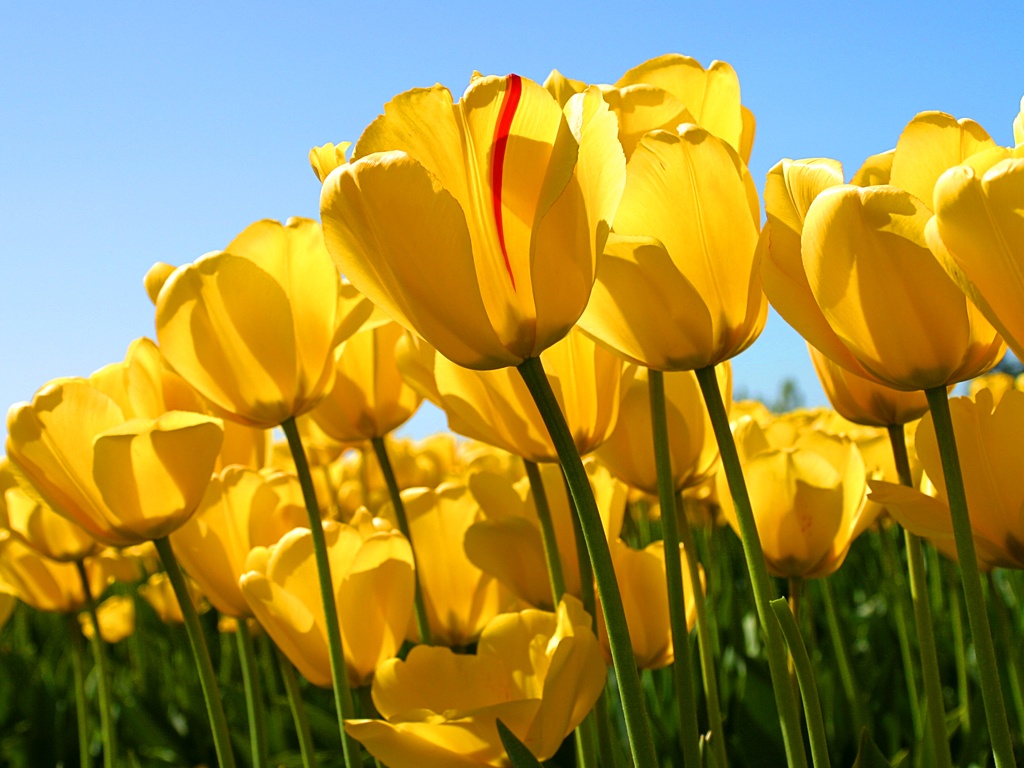
So for today’s post, I will use the sample picture in Windows 7 calls “Tulips”.
You can find it online in a really good quality.
For example: here and here Here is a smaller version of it.
The process in which I do this is simply creating a mask.
A mask is a gray scale image that represents the transparency I want. Black represents transparent,
and white represents opaque.
Later I compose my mask and the original image together to a single image with transparent background.
Unavoidably, the content of the entire image become a bit transparent.
To restore the image, I duplicate it a bunch of times and I flatten all the duplication together.
The outcome is quite good![]()
The script I wrote leaves all the temporary images.
You can add a remove command for them or remove them manually as I like to.
@echo off
set IMAGE=%1
set SUFFIX=%2
convert %IMAGE%.%SUFFIX% ( +clone -fx p{0,0} ) -compose Difference -composite -modulate 100,0 -alpha off  %IMAGE%_difference.png
convert %IMAGE%.%SUFFIX% %IMAGE%_difference.png -compose Copy_Opacity -composite %IMAGE%_trans.png

for /l %%x in (1, 1, 20) do (
 convert %IMAGE%_trans.png  +clone  -background none   -flatten   %IMAGE%_trans.png
 ping -n 2 127.0.0.1 >nul

)
The UNIX version
Here is the same script for unix - find it in this repo alongisde a docker for trying out
#!/bin/bash
IMAGE=$1
SUFFIX=$2
echo "converting ${IMAGE}.${SUFFIX}"
convert ${IMAGE}.${SUFFIX} \( +clone -fx 'p{10,10}' \) -compose Difference -composite -modulate 1,0   ${IMAGE}_difference.png
convert ${IMAGE}.${SUFFIX} ${IMAGE}_difference.png -compose Copy_Opacity -composite ${IMAGE}_trans.png

# At this point the entire image is too transparent, but the background is removed..
# We will clone the image over an over, and combine them to get the image itself back with a good opacity.

for i in {1..20}
do
  convert ${IMAGE}_trans.png  +clone  -background none   -flatten   ${IMAGE}_trans.png
  sleep 0.1
done
When do I not use imagemagick?
The tulips image is not a usual website scenario as it is in an extremely good quality.
Try this script on website logos to see that it works.
Even though the outcome is not that bad, it is still not good enough if quality is what you are after.
For example - try to find blurred leaves in the background, and notice what happens to them after I remove the background - they become less blurred.
When I try the same process on the Jellyfish image, I get even worse result.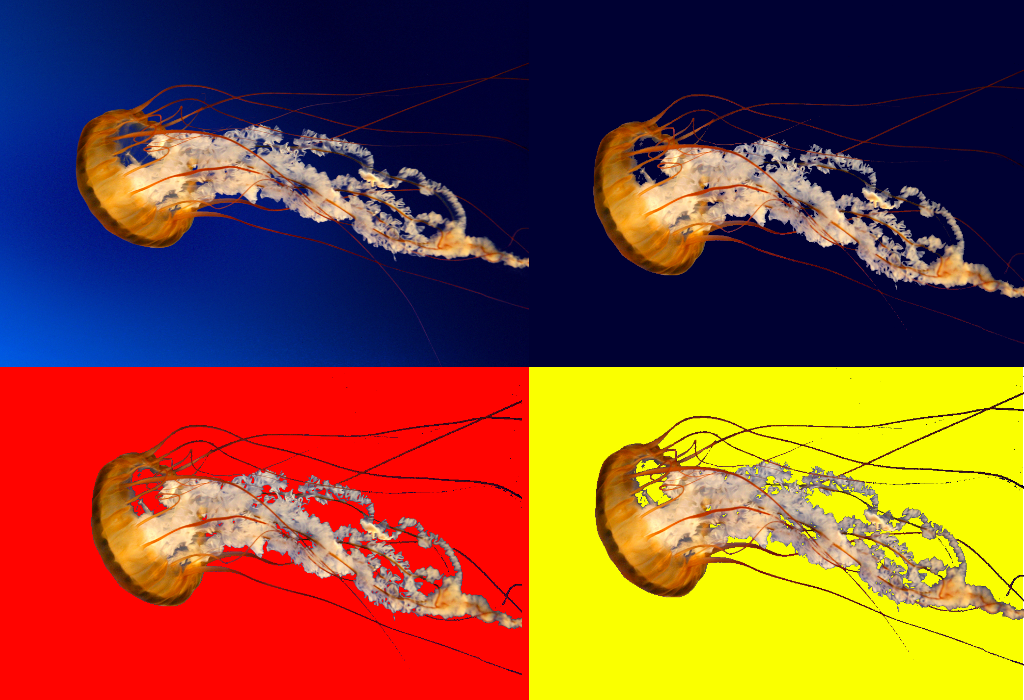
So if I have a lot of important little details in the image, I will go the extra mile and get a good quality image from the designer.
Gotchas
The commands assume the pixel on the top left represents the background color.
If for some reason this is wrong, you can choose to modify the script - imagemagick probably have a flag
you can push somewhere - or you can modify the image, for example add a border 1 px with the background color.
Simply negating also works sometimes.
convert image.png -negate to_trans.png